DaleDucatte.com

"Pay attention to the world." -- Susan Sontag
 

Found Flowers (Set 2 of 3): Luscious Lantana

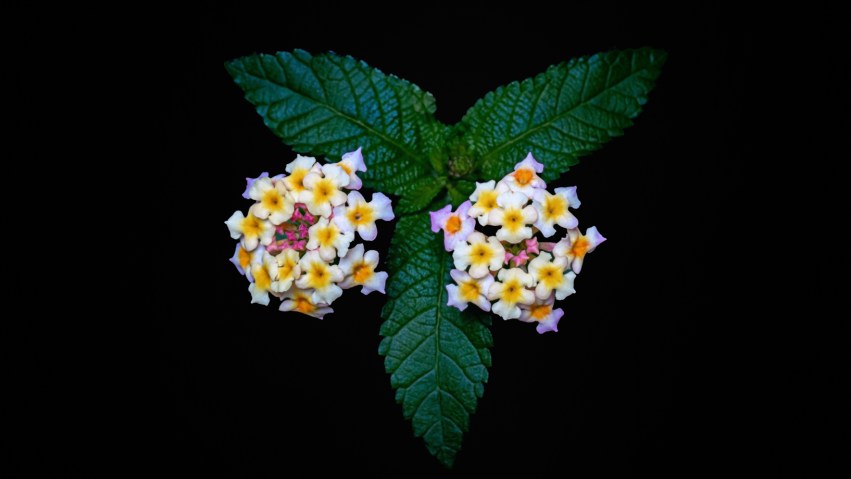
Hello! The gallery below contains lantana photos, the second of three galleries of reprocessed images from my archives.

The first set in this series is here: Found Flowers (Set 1 of 3): Marvelous Mandevilla.

Here are links to earlier posts containing some of the other “found photos” I recently reprocessed:

Wordless Wednesday: Five Found Flower Photos
Before and After: Tiny Bubbles
Wordless Wednesday: Hibiscus, Hibiscus, Bug

Thanks for taking a look!

Found Flowers (Set 1 of 3): Marvelous Mandevilla

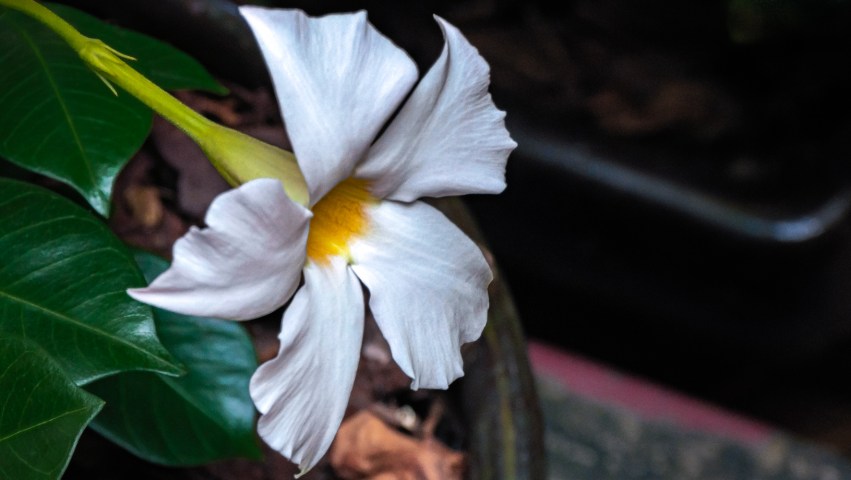
“Mandevilla” …. the word just rolls off your tongue, doesn’t it? I’ve previously posted pictures from a folder I recently found in my photo archives, of plants from my garden taken about ten years ago, resurrected and reprocessed with Lightroom and the Nik Collection. I’ve grouped the remaining photos into three galleries — this one, of mandevilla, that I’m posting today; and second and third galleries of a canna lily and additional lantana that I’ll post in the next few days.

This mandevilla variation was a Sun Parasol White Mandevilla, known for its giant blooms, large leaves, and rapidly growing vine. As you can see from the photos, the flower buds start out as mostly white with pink tint, then open to reveal a bright yellow center surrounded by white and a diminished pink frost. Mandevilla variants available to me locally are normally annual, so I buy at least a couple new ones each year, varying colors among white, pink, and red — the colors I typically find at garden centers nearby. Occasionally, if the winter months are warm enough, the mandevilla will return for one extra spring, a bonus I usually embrace by repotting the plant … and buying a couple more!

Here are links to the previous posts containing some of the “found photos” from my archives:

Wordless Wednesday: Five Found Flower Photos
Before and After: Tiny Bubbles
Wordless Wednesday: Hibiscus, Hibiscus, Bug

Thanks for taking a look!

Before and After: Tiny Bubbles

Every now and then I like to prowl around in my photo archives to see if there are some images I’ve forgotten about that capture my imagination, freshly. The photos I posted on Wordless Wednesday last week (Wordless Wednesday: Five Found Flower Photos) came from one of those prowling expeditions, when I discovered a folder containing about 200 photos that — despite all the photo rework I had done for my Flickr Reboot project — I had overlooked. They were all taken nearly a decade ago, one fine spring day, when many of the flowers were in bloom, and include bee balm, butterfly bushes, coneflowers, hibiscus, lantana, and mandevilla. I’m working through them all now, and will upload a few galleries throughout the week, but I finished this set of lantana blossoms that all had tiny bubbles in common, and decided to post them now.

I think these are photos of Mozelle Lantana — though I’m not entirely sure. I’ve grown many lantana varieties, some perennial, some annual, and some that were technically annual but came back for a couple of years anyway. If I could tell from the photos where on my property they were taken, I’d know for sure; but, as you can see, there is no defining background detail so I’m guessing the plant’s name based on the variety of colors in the blooms. I had just watered the garden, and when I noticed how the water droplets attached to the flowers as little glassy bubbles, I abandoned my gardening chores and brought out the camera instead.

The first gallery shows the final versions of these eleven images, after processing them through Adobe Lightroom and the Nik Collection. Select any image to see larger versions; and if you would like to read more about how the photos were processed, scroll down.

The second gallery shows the before-and-after versions of the eleven images above. I like to write these before-and-after posts (which are now assigned to their own category on this site) to help me think about what I’m doing with image processing and give me practice explaining it. One of the key things I’ve learned from all this practice, though, is this: subtle changes can improve a photo as much as drastic ones, but the cumulative effect of a set of subtle changes can be pretty dramatic.

Cropping and straightening are the first two things I do to every image in a set I’m working on, to set the images to 16×9 aspect ratio if I didn’t take them that way in the camera. Once that’s done, I use Lightroom’s automatic tone adjustments, letting Lightroom adjust exposure, contrast, highlights, shadows, whites, and blacks. I then apply the same level of sharpening and noise reduction to every photo.

These initial adjustments establish a starting point for the rest of my workflow in Lightroom and the Nik Collection. After completing them, I refine Lightroom’s automatic adjustments, typically reducing exposure slightly if it looks like Lightroom has over-exposed the images. With these photos, I also darkened both shadow levels and blacks, which emphasized color in the flowers without adding saturation or luminance.

Since it was High Pollen Season in Atlanta when I took these photos, the before images show a yellow cast from the pollen dust as well as artifacts that collected on the camera lens and the flowers — which present as dark dashes (if on the lens), black spots (if in the shadows) or white spots (tiny-bright “light catchers” from the sun). I removed some of the yellow color cast by adjusting white balance to a cooler (more blue) setting, then used spot removal to clean up the artifacts and dust. As a final step in Lightroom, I adjusted the sharpening mask, which has the effect of applying more sharpening to the image foreground and less to the background, reducing the appearance of background noise. In Lightroom, you can press the right-slash (/) key to compare the before and after versions of any photo you’re working on, so I used that to perform a quick visual check on each one, to make sure I hadn’t strayed too far from the original image with my adjustments. Then I selected each image for processing with Nik Collection’s Color Efex Pro.

From all my practice with Color Efex Pro, I’ve settled on a handful of filters that I apply to photos when I’m trying to enhance realism but not necessarily add creative effects. To make the process more efficient, I have a recipe set up in Color Efex Pro to apply the effects to each photo simultaneously, then work through them to adjust settings on individual photos:

  • White Neutralizer, which brightens whites without altering any of the other colors.
  • Brilliance/Warmth, which increases saturation and has a setting called “perceptual saturation” that enhances the three-dimensional or depth-perception character of the image.
  • Tonal Contrast, which I use to soften backgrounds if I want to further reduce background detail beyond Lightroom adjustments; or Pro Contrast, if I want contrast adjustments but want to retain background detail.
  • Darken/Lighten Center, which I use to shift visual focus to a specific area of the image and create additional background shadowing.
  • Remove Color Cast, to remove any color cast that has been created by the other adjustments — which, for these photos, consisted of ridding the photos of too much yellow or green shading.

That’s it! Thanks for reading and taking a look!